Showing posts with label tutorials. Show all posts

Nov 13, 2011

Beautiful Bokeh

Christmas is upon us, therefore I felt it necessary to do a post dedicated to my love of all things Bokeh :)

According to Wikipedia, Bokeh is defined as: " The blur, or the aesthetic quality of the blur, in out-of-focus areas of an image, or "the way the lens renders out-of-focus points of light."  In more understandable terms, Bokeh is basically little, pretty balls created by out of focus lights. It is also prevalent in photographs with a shallow depth of field. 


The reason I decided to relate this post to the upcoming Christmas holiday, is because Bokeh is a great addition to any holiday picture, and can be created by lights on a Christmas tree. It also can be made into fun little shapes which I will teach you how to make in a bit. First, a few examples of some Bokeh photography....


Copyright Kristen Cassidy Photography 2011

Copyright Kristen Cassidy Photography 2011

Copyright Kristen Cassidy Photography 2011

These are a few photos I took last Christmas, while i was experimenting with some Bokeh techniques. Youll notice the heart shaped bokeh in the last photo, I made a nifty little gadget to achieve those. Ill explain that in a bit....


How To Achieve Bokeh

As I mentioned earlier, Bokeh is most often achieved by photographing lights out of focus, or using a shallow depth of field. What I did with the above photographs was point my camera at the tree, and play with the focus. I could see the effect taking place as I was moving my camera in and out of focus. Once I had the right effect, I took the picture. Simple as that. 
With the photo below, there is natural Bokeh (in the background, behind the flower) which was achieved by photographing my subject with a shallow DOF.
Copyright Kristen Cassidy Photography 2011


Creating Bokeh Shapes

This is so easy, I love it. It creates some awesome effects :) 
You ll need:
1. A piece of black construction paper, or card stock. Card stock typically works better because its thicker.
2. A shape puncher, or you can use a pair of scissors to cut out your own shape
3. Scissors 
4. Tape

1. Take your camera lens, and trace a circle around the piece of black paper. Make sure the paper is the same shape and size as your lens.

2. In the middle of your circle, you can cut out a shape, or use a shape puncher to punch out the desired shape for you. You can make the shape as small or as large as you like, but make sure its not too big. Tiny to medium will do, I chose to do a small heart.

3. Use a piece of scotch tape to hold the paper with your shape on it to your lens. You can lightly tape it just enough so it will stay.

4. Aim your camera with your shape attached to your lens at a light source (Christmas tree lights work best) and play with your focus. Once you are out of focus enough, you can actually see your bokeh shapes taking effect, shoot away!

There you have it, super easy!

Another Way To Get Some Bokeh...

Do a search on flickr for Bokeh Textures. A lot of people have bokeh textures you can apply to your photos, and they are free to download. 
To apply a bokeh texture to your photograph, you just need photoshop, here's how:

1. Open your photograph that you want to apply your texture to in Photoshop


2. Open your Bokeh texture image


3. Select all on your bokeh texture, and copy. Paste the texture onto your photograph

4. Go to image > transform > free transform (command+ t for a mac)

5. Adjust your bokeh texture so that it covers your entire photograph, double click to un-select.
6. Now you can play with your blend modes...I tend to go with the "Multiply" blend or "Soft light" as it blends well without being too light as the "Overlay" blend tends to be. You can choose whichever blend mode works best for you. Also, play with the opacity if the bokeh texture is a little too harsh on your photograph.

voila! Easy way to add some nice bokeh effect :)

Copyright Kristen Cassidy Photography 2011

Copyright Kristen Cassidy Photography 2011

Hope you enjoyed this tutorial, have a great time creating some wonderful Bokeh images this holiday season!

Oct 1, 2011

New Series: Photography Tips & Tutorials : Getting Started

Recently, I have been posting a lot of fun pictures on my facebook page that I have taken of my son. A lot of my friends are mommies, and they are always asking, "How did you get those beautiful pictures? Did you hire a professional?" I decided that this would be a great topic to discuss on my blog.

I am self taught, and am no expert by any means. I have done extensive research, had years of practice, and had the opportunity to pick the brains of some very talented photographers. This is how I got where I am, and Id like to pay it forward by teaching you all how to take better, more professional looking pictures.

Getting Started: Equipment

1. The Camera
If you are serious about photography, and have the money, I definitely recommend purchasing a DSLR camera. I personally have had great experience with Canons. I currently use a Canon Rebel x2i. Obviously by using a DSLR, you are going to get clearer, more crisp photo's, with the option of printing them at humongous sizes. If you don't have the money to get a DSLR, don't fear...A point and shoot still has the capability of taking beautiful photos with the added help of a little post processing (Ill discuss that a little later)

2. A Flash
If you have a DSLR, I personally recommend purchasing an external flash. This is a device that attaches to your camera, and is an alternative to the built in flash that I find to be a little harsh sometimes. If you are working with a point and shoot, your built in flash is your only option, and you can work with it. Also, if you have a point and shoot, there is a great tutorial on how to create a DIY flash diffuser. Diffusers help eliminate harsh light and shadows and can help leave your photos looking more natural. A diffuser is a great purchase for any camera, but again, you can still achieve beautiful pictures without one.


Soft, dreamy photos using a flash


3. A Tripod


Tripods are a must have if you are interested in taking your own family portraits, shooting night photography, and more. 
DSLR: By personal experience, spend the money on a nice tripod... Its worth it. I once purchased a cheap version on amazon, thinking, its still a tripod. I soon learned that it was a total waste of money. Not only was it near impossible to adjust height, it was extremely flimsy and barely held my camera without toppling over. Luckily, my wonderful father purchased me a really nice tripod for Christmas, and what a difference! You want to be able to place your camera on your tripod, and move it around in different angles without it falling over. Also, being able to easily manipulate the height is a big help especially when shooting family portraits. 


Point and Shoot: Guess what? They make these adorable little mini-tripods for point and shoot camera's! They are great, and actually can be purchased at places like Walmart and Target. They are called "Gorillapods". Super flexible, sturdy, and so cute! Visit their website here

Maternity self portrait using a tripod


4. Shutter Release (optional, but handy)
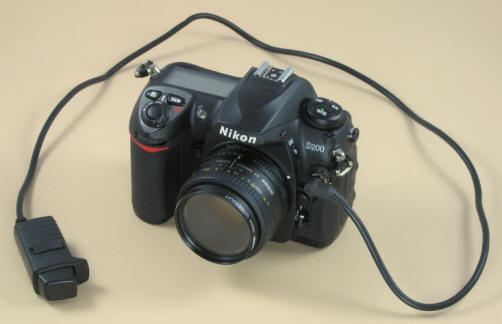
I love my shutter release. I did purchase a cheap one on Amazon, but it works great. It cost me about 12$, and its not attached to a cord which gives me more freedom when using. These are made mainly for DSLR camera's. I am not sure if they are made for point and shoots, only because there is a certain setting on your camera that allows you to use a shutter release. I recommend checking your camera settings for that option, if it is there, it should work.


5. Lenses
The lens you have on your point and shoot is fine. In fact, if you decide you want some of the added perks of different lenses that DSLR's have, photojojo.com has a great selection of lenses built specially for the point and shoot camera.
For the DSLR users, I honestly believe that the basic lens that comes with your camera is the best. I use it for almost everything. If you decide you really want to get into photography, then a telephoto lens is great for shooting things from far away (I use mine for shooting animals and wildlife). Also,  a portrait lens is a must have. It is usually 105 mm lens, and it will give you that wonderful focused image with a soft background. This can be achieved with the standard lens as well, but the portrait lens is a great addition to any lens collection.

Cant afford to buy a new lens? Rent One! My dad dabbles in photography, and he was attending a Native American Pow-Wow in Wisconsin one year. He really needed a super telephoto lens so he could capture the festivities without getting all up in everyone business. He found a great site where you can rent any lens you wish for a weekend, a week, or two weeks. I plan on utilizing this service during the winter months when the Bald Eagles migrate through Missouri. Last year, my telephoto lens worked, but I really want those beautiful close ups. I don't have the money for one of these lenses, so renting is a wonderful option!
Visit Lens Rentals.com here!


That is the very basic equipment i personally recommend having to take better pictures. Again, I am not an expert by any means, just speaking from personal experience. I started off very basic, with only one lens. After seeing how much I loved photography, I slowly began to add to my collection. That's the beauty of photography, there is always something exciting that is coming out to further your hobby!

Using a telephoto lens allows you to get great close up shots of hard to reach subjects


Getting Started: Post Processing


My favorite post processing program to use is Adobe Lightroom. However, this program is pretty pricey. Cant afford to splurge? The post processing website I started with (btw- its free) is picnik. Picnik is a free photo editing website, that is AMAZING. Its the best out there in my oppinion. Its also great for someone who doesn't have a ton of time (cough, cough, moms). It allows you to add beautiful effects to your photos in just seconds. I will be adding lots of tutorials on how to use picnik, as I really loved that site. I eventually got Adobe Lightroom and Photoshop, and with the kind of photography I do now, it works better for me. I still use Picnik though!

Photograph edited using picnik


Getting Started: Resources

When I was first getting involved with photography, I spent countless hours researching online, reading books, etc. During that time, I found some amazing websites that really taught me a lot. They also inspired me to get out and just shoot tons of pictures, which in return, made me a better photographer. If you have time, check them out...you wont be disappointed!

1. Digital Photography School
This is my favorite, and endless supply of photography knowledge, tutorials and post processing help.

2. Photojojo
This site is a super creative, fun source that teaches you ways to look outside the box with photography. It also has a bunch of really fun photography products available for purchase directly from their site.

3. Photo.net
This is a great online community of really nice photographers, and photography enthusiast. The forums have helped me with a lot of questions, and everyone always seems willing to help out a newbie :)

4. Chookooloonks
Karen Waldrond is not only an amazing photographer, she is a strong, smart women who inspires me in every aspect. She features great photography advice, and also writes amazing articles that just empower you on a daily basis. Her blog features some of her AMAZING photography, and I have found endless amounts of inspiration from her. Definitely a daily read.

LinkWithin

Related Posts Plugin for WordPress, Blogger...