I am going to be brutally honest with you... For the longest time I never paid any attention to White Balance. It was something I thought didn't matter too much when it came to my pictures. I was wrong. Once I took the time to learn and read about white balance, and then put that knowledge to use, my pictures started improving a lot. White balance is part of the whole picture (no pun intended) when it comes to photography, mastering it along with all the other elements is essential in taking good pictures.
So...What is white balance?
"White balance (WB) is the process of removing unrealistic color casts, so that objects which appear white in person are rendered white in your photo." - Cambridge In Color
In your DSLR, you will find 7 different white balance settings. Each one has a specific purpose in adding proper color to your photos.
Auto : This is the setting that allows your camera to choose your white balance for you. Although the simple choice, it is not always the right choice. I will explain this in more detail later.
Tungsten: This setting is most suitable for shooting indoors. I actually use this setting when I photograph Christmas lights inside my home. It tends to cool down your photo's and makes lights look really nice in your photography.
Flourescent: Indoor lighting is usually fluorescent and gives off a cool tone to your photos. When used, this setting will add some warmth back into your photos when photographing indoors.
Daylight / Sunny: Most basic form of white balance, used best when shooting outside in sunlight. Adds a bit more cool tones, but not by a lot.
Cloudy: Similar to daylight, but will add more warmth back into your photos. Great for cloudy days that tend to give off more cool tones.
Flash: I recently learned to use this setting whenever using a flash as it adds in warmth that a flash can take away from a photo. Flashes give cool lighting, to eliminate, use this setting for a good balance of warm and cool tones.
Shade: Again, with no sunlight, your photo will tend to have cooler tones. This setting will add warmth back into the shaded photo.
As you can see, all of the above settings will add a certain amount of coolness or warmth into your photos. Knowing what kind of tones your light gives off, you will need to counteract by changing your white balance setting so that you are having even tones in your photographs.
Using A White Balance Grey Card
A great technique you can use post processing to ensure your white balance is 100% accuracy, would be to use a grey card. You can purchase one online for a cheap price, or even use a piece of grey scrap booking paper (just make sure its not reflective or shiny).
What you do, is take a test shot of your subject while holding a grey card in the photo. Repeat this each time your subject, scenery, or lighting changes.
Bring the photo with your grey card up in your post processing program. (This will work with professional processing programs such as adobe lightroom, photoshop, raw etc. It will also work with any processing program that has a white balance tool.)
Click on your white balance tool, and then click on the grey card in your photo. This will automatically adjust your white balance settings so they are accurate for each photo.
This is a great method because you dont need to worry about adjusting your white balance settings on your camera each time your lighting situation changes. Just take a new test shot with the grey card in the
photo, and adjust later during your post processing.
Any questions? Feel free to email me, and I would be happy to help!
Make sure to check out these great articles for more help as well :)
Digital Photography School: Get Your White Balance Right In Seconds Using A Grey Card.
Cambridge In Color: Understanding White Balance
Digital Photography School: Introduction To White Balance

Showing posts with label photography tips. Show all posts
Showing posts with label photography tips. Show all posts

Jan 8, 2012
Some tips on pet photography
One of the hardest things to photograph other than children is pets. Its very frustrating at times because dogs cant speak english. They dont understand you when you shout commands at them such as "Turn your head to the left" "Make a silly face" etc. However, if you do get a good shot its so rewarding to be able to capture some of your pets personality on film that you will have for a lifetime.
Here is a few tricks I have learned along the way :)
1. Be Patient
Get your pet comfy in a nice setting, obviously photographing them laying in a pile of junk on the ground isnt going to make a nice photo :) I usually will lure my dogs into a nice area by giving them a bone or something and once they are there, i just sit and wait. The key here is to be patient with them, let them do their own thing and then snap away. Patience pays off because you will eventually get the money shot, i promise :)
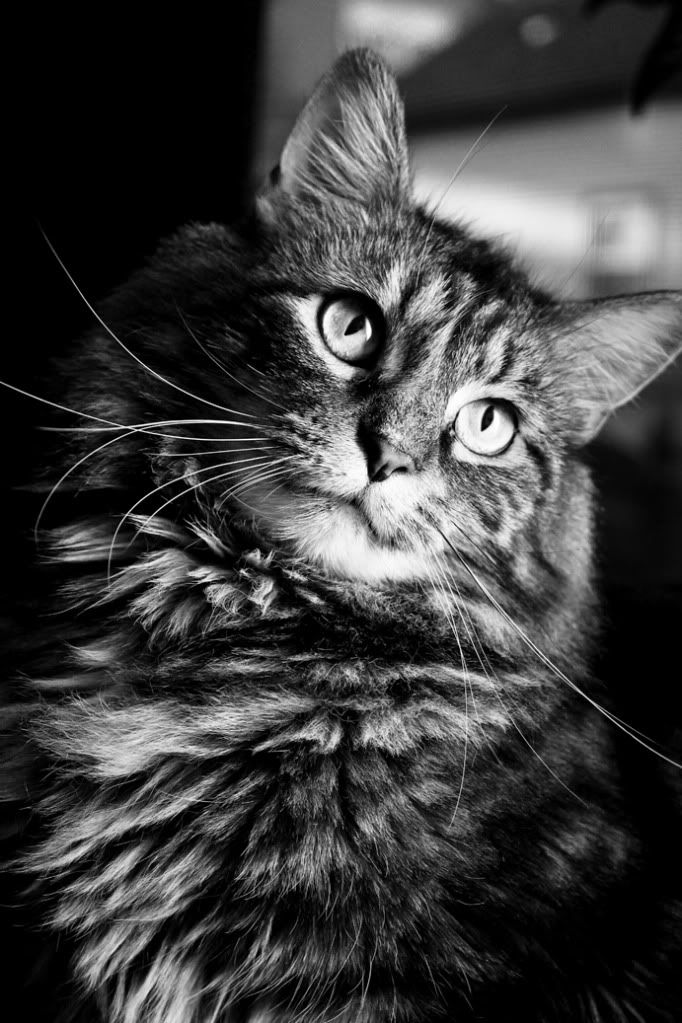
2. Quantity Matters
Another essential piece of advice is to snap as many shots of your pet as you can. I like to put my camera on continuous shoot so when I snap away, my camera is taking picture after picture really fast. The more photographs you take the better chance you will have of getting some great shots. A great pet photograph is catching your pets personality, and the best way to do that is let them play and do what they do and just snap a ton of pictures while they are doing it.
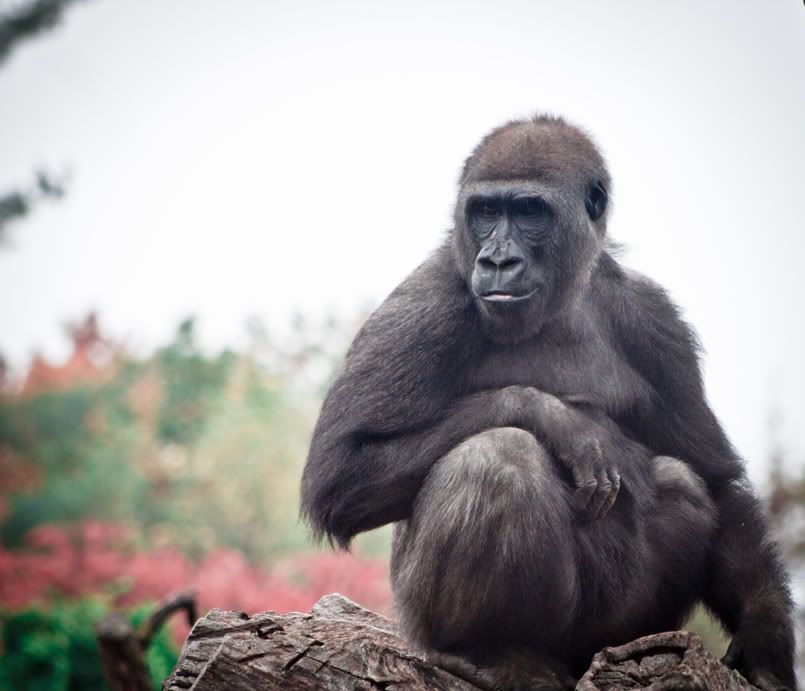
3. Get Down On Their Level
Get ready to lay down, bend over awkwardly and be prepared to get a lil' dirty...its worth it. Some of the coolest pet shots are taken from the animals eye level.
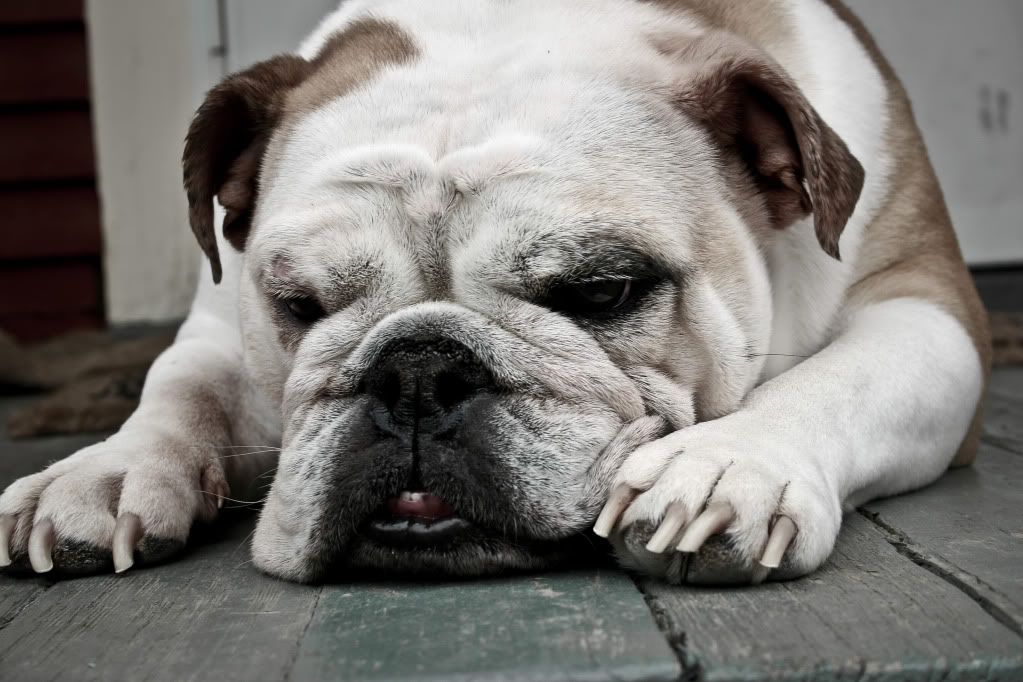
4. Try Some New Angles
I have gotten a few awesome pet shots by photographing the animal from the ground looking up at them. This perspective makes your animal look majestic :) I like taking this angle with cats because of course cats think they are hot stuff and queens/kings of the world, so why not photograph them in that perspective? It makes for some unique footage.
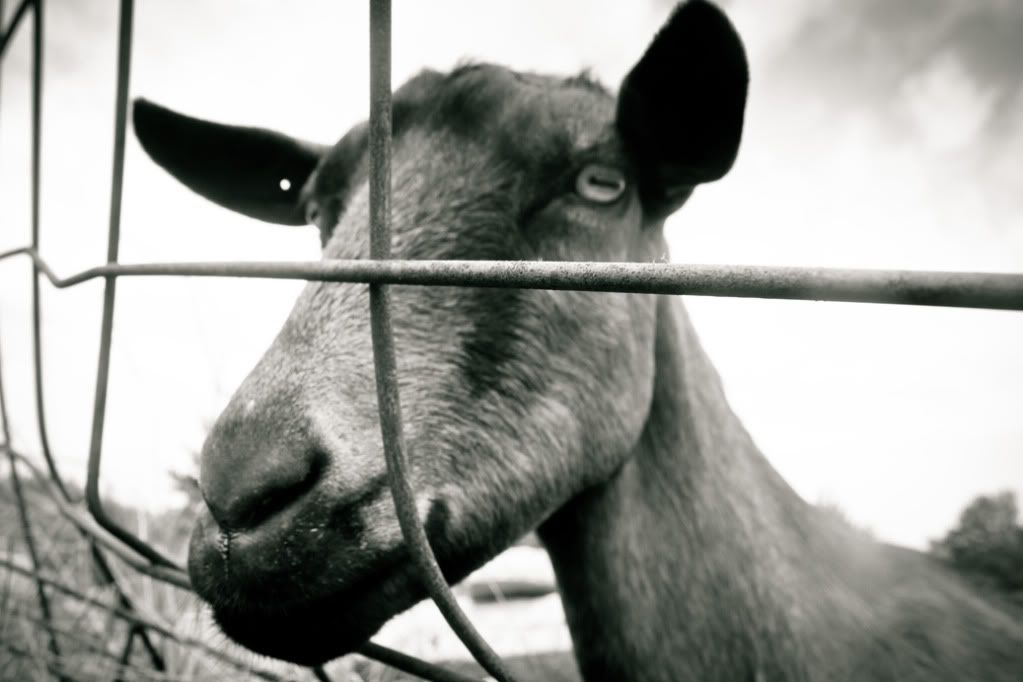
5. Get a zoom lens
This is helpful when photographing zoo animals. Obviously you cant get all close up to them, so having the zoom lens makes your photographs look like you were on a safari and came close up with a lion or tiger. It also comes in handy when the animal is caged. I discovered last fall that if i zoom in really close, it blurs the cage enough to the point where you cant even see it at all. A zoom lens also comes in handy with bird photography.

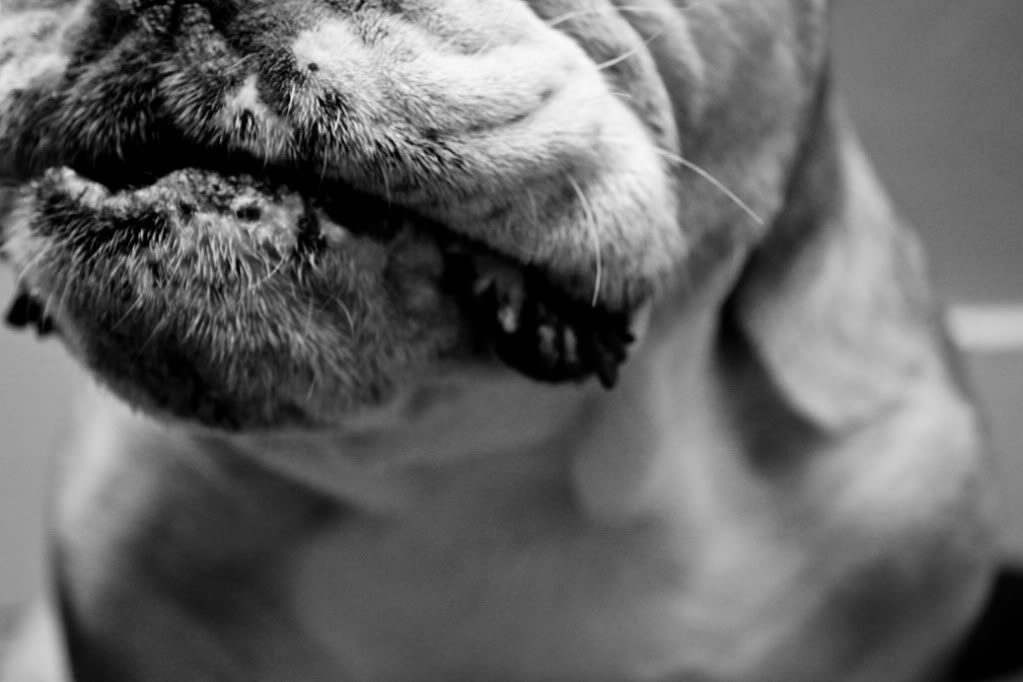
6. Dont fret if you cant get the whole pet in the photo...
I got a really cool shot of my dog last year...He would NOT pose for me, and I couldnt get him to sit still so I just started snapping away. I found I got a cool shot of half of his mouth while he was barking. It was a unique photo, and I really love it. So even getting your pets paws, their tails, or even their wet noses could make for a cool picture!
7. Dont even try and dress up your pets.
Ive tried, and trust me its not pretty. Unless your dog is sleeping or heavily sedated, they will act very awkward when dressed up. My dog does this weird freeze mode whenever I put a sweater on him. Every picture i took of him showed a dog looking scared half out of his mind as if he was thinking "Is this okay mommy? Am I done yet? " Not a good look, I love the animals in their natural, naked selves. Use some props instead, this can still give a really cool effect without making your animal feel slightly embarassed :)
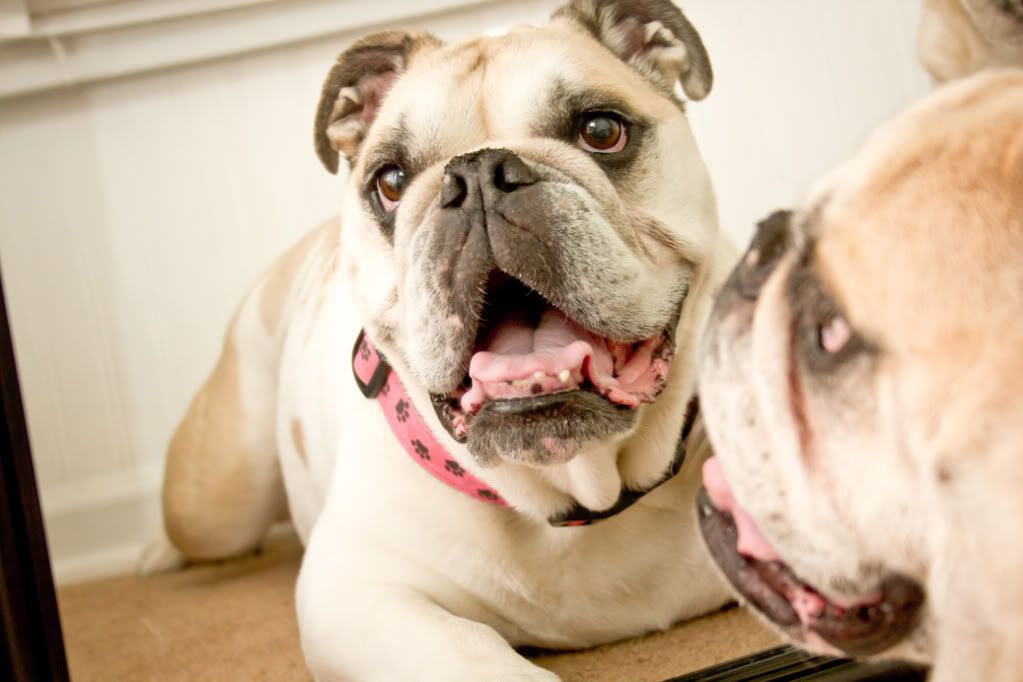
8. Get in the picture with your pet
If able to, grab a tripod, and a shutter release and get in there with your pal. Sometimes, they are even more comfortable playing with their master and also, its a priceless shot of you and your favorite furry friend together that you can treasure forever!

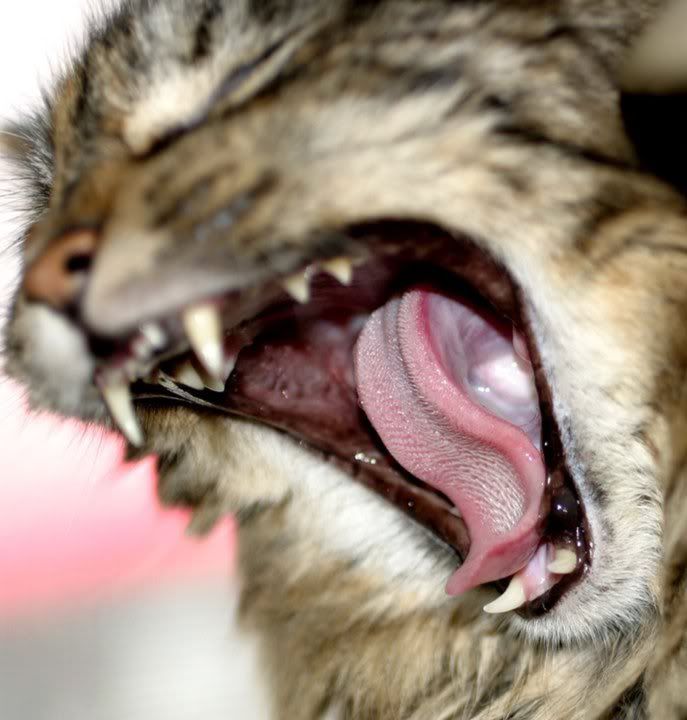
9. Cool Ideas for Cats
Get a shot of your cat stretching, yawning, licking its paws, or playing with the birds in the window. These make for some awesome and unique photographs
10. Cool Ideas For Dogs
I love to get to eye level with my dogs when they are lounging...this makes them look all adorable and innocent like. Also, I found a cool trick was to whistle really loud, it usually makes the dog do that adorable head tilt thing you always die over in pet photography.

Hope these tips help, id love to see some of your photographs featuring your pets or some cool animals!

Here is a few tricks I have learned along the way :)
1. Be Patient
Get your pet comfy in a nice setting, obviously photographing them laying in a pile of junk on the ground isnt going to make a nice photo :) I usually will lure my dogs into a nice area by giving them a bone or something and once they are there, i just sit and wait. The key here is to be patient with them, let them do their own thing and then snap away. Patience pays off because you will eventually get the money shot, i promise :)
2. Quantity Matters
Another essential piece of advice is to snap as many shots of your pet as you can. I like to put my camera on continuous shoot so when I snap away, my camera is taking picture after picture really fast. The more photographs you take the better chance you will have of getting some great shots. A great pet photograph is catching your pets personality, and the best way to do that is let them play and do what they do and just snap a ton of pictures while they are doing it.
3. Get Down On Their Level
Get ready to lay down, bend over awkwardly and be prepared to get a lil' dirty...its worth it. Some of the coolest pet shots are taken from the animals eye level.
4. Try Some New Angles
I have gotten a few awesome pet shots by photographing the animal from the ground looking up at them. This perspective makes your animal look majestic :) I like taking this angle with cats because of course cats think they are hot stuff and queens/kings of the world, so why not photograph them in that perspective? It makes for some unique footage.
5. Get a zoom lens
This is helpful when photographing zoo animals. Obviously you cant get all close up to them, so having the zoom lens makes your photographs look like you were on a safari and came close up with a lion or tiger. It also comes in handy when the animal is caged. I discovered last fall that if i zoom in really close, it blurs the cage enough to the point where you cant even see it at all. A zoom lens also comes in handy with bird photography.
6. Dont fret if you cant get the whole pet in the photo...
I got a really cool shot of my dog last year...He would NOT pose for me, and I couldnt get him to sit still so I just started snapping away. I found I got a cool shot of half of his mouth while he was barking. It was a unique photo, and I really love it. So even getting your pets paws, their tails, or even their wet noses could make for a cool picture!
7. Dont even try and dress up your pets.
Ive tried, and trust me its not pretty. Unless your dog is sleeping or heavily sedated, they will act very awkward when dressed up. My dog does this weird freeze mode whenever I put a sweater on him. Every picture i took of him showed a dog looking scared half out of his mind as if he was thinking "Is this okay mommy? Am I done yet? " Not a good look, I love the animals in their natural, naked selves. Use some props instead, this can still give a really cool effect without making your animal feel slightly embarassed :)
8. Get in the picture with your pet
If able to, grab a tripod, and a shutter release and get in there with your pal. Sometimes, they are even more comfortable playing with their master and also, its a priceless shot of you and your favorite furry friend together that you can treasure forever!
9. Cool Ideas for Cats
Get a shot of your cat stretching, yawning, licking its paws, or playing with the birds in the window. These make for some awesome and unique photographs
10. Cool Ideas For Dogs
I love to get to eye level with my dogs when they are lounging...this makes them look all adorable and innocent like. Also, I found a cool trick was to whistle really loud, it usually makes the dog do that adorable head tilt thing you always die over in pet photography.
Hope these tips help, id love to see some of your photographs featuring your pets or some cool animals!

Nov 13, 2011
Beautiful Bokeh
Christmas is upon us, therefore I felt it necessary to do a post dedicated to my love of all things Bokeh :)
According to Wikipedia, Bokeh is defined as: " The blur, or the aesthetic quality of the blur, in out-of-focus areas of an image, or "the way the lens renders out-of-focus points of light." In more understandable terms, Bokeh is basically little, pretty balls created by out of focus lights. It is also prevalent in photographs with a shallow depth of field.
The reason I decided to relate this post to the upcoming Christmas holiday, is because Bokeh is a great addition to any holiday picture, and can be created by lights on a Christmas tree. It also can be made into fun little shapes which I will teach you how to make in a bit. First, a few examples of some Bokeh photography....


4. Go to image > transform > free transform (command+ t for a mac)
5. Adjust your bokeh texture so that it covers your entire photograph, double click to un-select.
Hope you enjoyed this tutorial, have a great time creating some wonderful Bokeh images this holiday season!
According to Wikipedia, Bokeh is defined as: " The blur, or the aesthetic quality of the blur, in out-of-focus areas of an image, or "the way the lens renders out-of-focus points of light." In more understandable terms, Bokeh is basically little, pretty balls created by out of focus lights. It is also prevalent in photographs with a shallow depth of field.
The reason I decided to relate this post to the upcoming Christmas holiday, is because Bokeh is a great addition to any holiday picture, and can be created by lights on a Christmas tree. It also can be made into fun little shapes which I will teach you how to make in a bit. First, a few examples of some Bokeh photography....
 |
| Copyright Kristen Cassidy Photography 2011 |
 |
| Copyright Kristen Cassidy Photography 2011 |
 |
| Copyright Kristen Cassidy Photography 2011 |
These are a few photos I took last Christmas, while i was experimenting with some Bokeh techniques. Youll notice the heart shaped bokeh in the last photo, I made a nifty little gadget to achieve those. Ill explain that in a bit....
How To Achieve Bokeh
As I mentioned earlier, Bokeh is most often achieved by photographing lights out of focus, or using a shallow depth of field. What I did with the above photographs was point my camera at the tree, and play with the focus. I could see the effect taking place as I was moving my camera in and out of focus. Once I had the right effect, I took the picture. Simple as that.
With the photo below, there is natural Bokeh (in the background, behind the flower) which was achieved by photographing my subject with a shallow DOF.
 |
| Copyright Kristen Cassidy Photography 2011 |
Creating Bokeh Shapes
This is so easy, I love it. It creates some awesome effects :)
You ll need:
1. A piece of black construction paper, or card stock. Card stock typically works better because its thicker.
2. A shape puncher, or you can use a pair of scissors to cut out your own shape
3. Scissors
4. Tape
1. Take your camera lens, and trace a circle around the piece of black paper. Make sure the paper is the same shape and size as your lens.
2. In the middle of your circle, you can cut out a shape, or use a shape puncher to punch out the desired shape for you. You can make the shape as small or as large as you like, but make sure its not too big. Tiny to medium will do, I chose to do a small heart.
3. Use a piece of scotch tape to hold the paper with your shape on it to your lens. You can lightly tape it just enough so it will stay.
4. Aim your camera with your shape attached to your lens at a light source (Christmas tree lights work best) and play with your focus. Once you are out of focus enough, you can actually see your bokeh shapes taking effect, shoot away!
There you have it, super easy!
Another Way To Get Some Bokeh...
Do a search on flickr for Bokeh Textures. A lot of people have bokeh textures you can apply to your photos, and they are free to download.
To apply a bokeh texture to your photograph, you just need photoshop, here's how:
1. Open your photograph that you want to apply your texture to in Photoshop

2. Open your Bokeh texture image

3. Select all on your bokeh texture, and copy. Paste the texture onto your photograph

4. Go to image > transform > free transform (command+ t for a mac)

5. Adjust your bokeh texture so that it covers your entire photograph, double click to un-select.

6. Now you can play with your blend modes...I tend to go with the "Multiply" blend or "Soft light" as it blends well without being too light as the "Overlay" blend tends to be. You can choose whichever blend mode works best for you. Also, play with the opacity if the bokeh texture is a little too harsh on your photograph.
voila! Easy way to add some nice bokeh effect :)
 |
| Copyright Kristen Cassidy Photography 2011 |
 |
| Copyright Kristen Cassidy Photography 2011 |
Oct 9, 2011
15 Photography Exercises To Get You Shooting
The key to all artist success, or to any kind of success for that matter is doing. You can read, take classes and analyze all you want, but that is not going to make you a good photographer. What is going to make you better, is practice. Here are a couple exercises to get you started.
1. Shoot one object, 100 times.
I actually did this photo project one winter night, when I was bored. I took 100 pictures of a fork at different angles, different lighting, etc. Believe it or not, i got some amazing shots out of this, and my "Fork You" picture has had tons of compliments, and has sold really well! Practice pays off.

2. 15 Steps
This works best on a nice day (no snow or rain). Take a walk with your camera. Every 15-20 steps, stop and photograph whatever is around you. Take at least 10 pictures of whatever catches your eye. This forces you to photograph things you see every day and put your own creative spin on them.
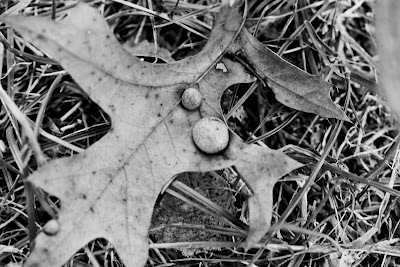
3. Color Scheme
Each day for a week, choose a certain color scheme and photograph things matching that particular color. This is a cool exercise because at the end, you can make some awesome photo collages.

4. Dog View
Shoot things around your house from your dogs point of view. This is going to add a creative angle to your photos that you might never have thought of otherwise.

5. Close Up Shots
Gain practice with depth of field and aperture by shooting your subject as close as your lens will allow. Even try photographing something normal super close where your viewer might have to even guess at what the object is you are photographing.

6. The Egg
This is a great exercise that will help you practice your white balance knowledge. Photograph an egg on a white piece of paper. Try photographing the egg with each different white balance setting. Doing this allows you to really see the differences of each setting, and how they affect the cool and warm tones. Also, photographing a white egg on white paper can really show you how lighting affects your photographs as well. This is also a good exercise to do to practice with your flash.

7. Take A Cruise
I did this last winter, and got some of my best selling photographs from the excursion. I do not live around anything cool, just open farmland and small towns. However, by just driving around aimlessly, I found some pretty unique things to photograph. Photographing things that are not cliche will really set your work apart, and get you noticed. Because I live in a small town, I don't have cliche things to photograph such as landmarks, mountains etc. This forced me to think outside the box for my shots, and it was a great experience. Just drive around for an hour with your camera and photograph anything that catches your eye, be creative!
8. Set Up A Photo shoot
Grab a friend or a family member, and head out to a nice park or other location for a mini photo shoot. This will give you some awesome practice with shooting people, and how to pose your subject. It will also give you some great shots to add to your portfolio.

9. Tell A Story
Get creative with your photography, and tell a story with your photos. You can do this by even choosing an emotion, and portraying that emotion through photographs. For example: you can take a bunch of pictures of your family or friends mouths only showing that emotion (like a smile, or a frown). Excitement can be portrayed through photographs of people jumping up and down, playing, dancing etc.

10. Get Inspired
Take an hour or less to just surf Flickr. You can gain tons of inspiration from other photographers and their pictures. You dont have to copy someone to gather inspiration, maybe a photo of a dog inspires you to take your pup out for a mini shoot. Or, a photo of a cup of coffee inspires you to gather some coffee beans and photograph them up close. Let your mind wander, and jot down anything that inspires you.

11. Body Parts
Photograph different body parts (appropriate ones lol) without showing faces. Hands, feet, eyes, ears etc.

12. Themed Grab Bag
Write down a bunch of different themes on tiny pieces of paper. Place them all folded, into a grab bag and choose one. Let that be your theme for the day, and photograph only things pertaining to that certain theme.

13. Find A Buddy
Find a buddy who likes photography, or even someone to just take a walk with. Bring your camera along, ask them if they see anything that stands out. Sometimes we are so used to looking for certain things to photograph, we miss beauty everywhere. Having a second pair of eyes and a different point of view can really open us up to even more possibilities.

14. Shoot In Black & White
Change your cameras settings to Monochrome and spend the day photographing things in black and white. Its amazing how different items appear when they do not have color to them.

15. Bugs
Get down and dirty in the backyard and photograph as many bugs as you can. As icky as they are, they do make for some pretty amazing photographs.

1. Shoot one object, 100 times.
I actually did this photo project one winter night, when I was bored. I took 100 pictures of a fork at different angles, different lighting, etc. Believe it or not, i got some amazing shots out of this, and my "Fork You" picture has had tons of compliments, and has sold really well! Practice pays off.

2. 15 Steps
This works best on a nice day (no snow or rain). Take a walk with your camera. Every 15-20 steps, stop and photograph whatever is around you. Take at least 10 pictures of whatever catches your eye. This forces you to photograph things you see every day and put your own creative spin on them.

3. Color Scheme
Each day for a week, choose a certain color scheme and photograph things matching that particular color. This is a cool exercise because at the end, you can make some awesome photo collages.

4. Dog View
Shoot things around your house from your dogs point of view. This is going to add a creative angle to your photos that you might never have thought of otherwise.

5. Close Up Shots
Gain practice with depth of field and aperture by shooting your subject as close as your lens will allow. Even try photographing something normal super close where your viewer might have to even guess at what the object is you are photographing.

6. The Egg
This is a great exercise that will help you practice your white balance knowledge. Photograph an egg on a white piece of paper. Try photographing the egg with each different white balance setting. Doing this allows you to really see the differences of each setting, and how they affect the cool and warm tones. Also, photographing a white egg on white paper can really show you how lighting affects your photographs as well. This is also a good exercise to do to practice with your flash.

7. Take A Cruise
I did this last winter, and got some of my best selling photographs from the excursion. I do not live around anything cool, just open farmland and small towns. However, by just driving around aimlessly, I found some pretty unique things to photograph. Photographing things that are not cliche will really set your work apart, and get you noticed. Because I live in a small town, I don't have cliche things to photograph such as landmarks, mountains etc. This forced me to think outside the box for my shots, and it was a great experience. Just drive around for an hour with your camera and photograph anything that catches your eye, be creative!
 |
| Photographed these beautiful cardinals while driving over a random railroad track. You never know what you'll find! |
8. Set Up A Photo shoot
Grab a friend or a family member, and head out to a nice park or other location for a mini photo shoot. This will give you some awesome practice with shooting people, and how to pose your subject. It will also give you some great shots to add to your portfolio.

9. Tell A Story
Get creative with your photography, and tell a story with your photos. You can do this by even choosing an emotion, and portraying that emotion through photographs. For example: you can take a bunch of pictures of your family or friends mouths only showing that emotion (like a smile, or a frown). Excitement can be portrayed through photographs of people jumping up and down, playing, dancing etc.

10. Get Inspired
Take an hour or less to just surf Flickr. You can gain tons of inspiration from other photographers and their pictures. You dont have to copy someone to gather inspiration, maybe a photo of a dog inspires you to take your pup out for a mini shoot. Or, a photo of a cup of coffee inspires you to gather some coffee beans and photograph them up close. Let your mind wander, and jot down anything that inspires you.

11. Body Parts
Photograph different body parts (appropriate ones lol) without showing faces. Hands, feet, eyes, ears etc.

12. Themed Grab Bag
Write down a bunch of different themes on tiny pieces of paper. Place them all folded, into a grab bag and choose one. Let that be your theme for the day, and photograph only things pertaining to that certain theme.
13. Find A Buddy
Find a buddy who likes photography, or even someone to just take a walk with. Bring your camera along, ask them if they see anything that stands out. Sometimes we are so used to looking for certain things to photograph, we miss beauty everywhere. Having a second pair of eyes and a different point of view can really open us up to even more possibilities.

14. Shoot In Black & White
Change your cameras settings to Monochrome and spend the day photographing things in black and white. Its amazing how different items appear when they do not have color to them.

15. Bugs
Get down and dirty in the backyard and photograph as many bugs as you can. As icky as they are, they do make for some pretty amazing photographs.

Hopefully these fun exercises can inspire you to get out there, and get photographing this week!
Oct 6, 2011
Taking Better Pictures: Post Processing
Now that you have taken lots of awesome pictures, lets discuss the final step in taking great pictures, post processing.
Unless your the God of photography, all photos need a little bit of help, and your post processing stage is going to allow you to put those finishing touches on your photo to make it just right.
Im going to first review the three programs I use for post processing, and then I will show you a few important techniques on correcting your photos on the computer.
1. Adobe Photoshop
This is probably the most common post processing program that most professionals use. It is tricky to learn, but is a valuable program if your interested in turning pro. Luckily, there is tons of websites out there offering free tutorials, advice and forums for begginers. I love photoshop, but even I haven't learned all there is to it. It is also an expensive program. Its worth the price, don't get me wrong, but if your just starting out and don't have the 1000$ to shell out on this program, I will tell you a great free service to use below.
2. Adobe Lightroom
Designed specifically for photographers, Lightroom is a fast, and efficient way to correct photographs. This program differs from Photoshop because while you can still add some special effects with Lightroom, Photoshop gives you more freedom to creatively manipulate photographs. Lightroom mainly allows you to fix, adjust and edit your photos. I work a lot in Lightroom because most cases i am just trying to add little effects to my photos, or minor fixes. Again, this program is expensive but worth the money. I would definitely start with Lightroom if you are going to spend money on one editing program, its easy to learn, and is quick and does its job and does it well.
3. Free- Picnik
Picnik is where i started. Its a free online photo editing site. It has two versions, pro and standard. I recommend getting the pro. Its 25$ for the whole year, and you have access to retouching, makeup effects, seasonal effects, and tons more. The pro version gives you access to so much, and it has a lot of things that Photoshop has as well so its a great place to start, and hello? Its free! I love picnik, it was where I started off at, and honestly, from time to time I still use it. I keep renewing my pro account because even if I don't use it as much for photo editing, I still utilize it for business card designs, web design and banners.
Now I would like to teach you the most important steps in post processing. Since i am assuming most beginners do not have access to Lightroom or Photoshop, I will go ahead and show you these steps in Picnik since its a free, online service that everyone has access to.
 This photo is a little dark to my liking, and I would like to first of all adjust the exposure to brighten it up a little bit.
What you will need to do is increase your exposure, and also adjust the contrast until your photo is brighter and to where you like it.

Next, I adjusted the saturation because my photo was a little on the warm side. This is similar to if you were adjusting your white balance to add just the right amount of cool tones into your photo.


Unless your the God of photography, all photos need a little bit of help, and your post processing stage is going to allow you to put those finishing touches on your photo to make it just right.
Im going to first review the three programs I use for post processing, and then I will show you a few important techniques on correcting your photos on the computer.
1. Adobe Photoshop
This is probably the most common post processing program that most professionals use. It is tricky to learn, but is a valuable program if your interested in turning pro. Luckily, there is tons of websites out there offering free tutorials, advice and forums for begginers. I love photoshop, but even I haven't learned all there is to it. It is also an expensive program. Its worth the price, don't get me wrong, but if your just starting out and don't have the 1000$ to shell out on this program, I will tell you a great free service to use below.
2. Adobe Lightroom
Designed specifically for photographers, Lightroom is a fast, and efficient way to correct photographs. This program differs from Photoshop because while you can still add some special effects with Lightroom, Photoshop gives you more freedom to creatively manipulate photographs. Lightroom mainly allows you to fix, adjust and edit your photos. I work a lot in Lightroom because most cases i am just trying to add little effects to my photos, or minor fixes. Again, this program is expensive but worth the money. I would definitely start with Lightroom if you are going to spend money on one editing program, its easy to learn, and is quick and does its job and does it well.
3. Free- Picnik
Picnik is where i started. Its a free online photo editing site. It has two versions, pro and standard. I recommend getting the pro. Its 25$ for the whole year, and you have access to retouching, makeup effects, seasonal effects, and tons more. The pro version gives you access to so much, and it has a lot of things that Photoshop has as well so its a great place to start, and hello? Its free! I love picnik, it was where I started off at, and honestly, from time to time I still use it. I keep renewing my pro account because even if I don't use it as much for photo editing, I still utilize it for business card designs, web design and banners.
Now I would like to teach you the most important steps in post processing. Since i am assuming most beginners do not have access to Lightroom or Photoshop, I will go ahead and show you these steps in Picnik since its a free, online service that everyone has access to.
Here is a picture I took of my son, no processing at all. Straight from my camera.

What you will need to do is increase your exposure, and also adjust the contrast until your photo is brighter and to where you like it.

Next, I adjusted the saturation because my photo was a little on the warm side. This is similar to if you were adjusting your white balance to add just the right amount of cool tones into your photo.

My photo looks pretty good now, but I would like to focus more on Jonah's face, and eliminate some of the background. So I then will crop the photo so that the focus is more on his smile :)

Now that the photo has been edited, you can either leave it the way it is or even add a special effect. I love black and white photo's where the eyes still have color to them. Since Jonah has such beautiful eyes, I decided to make this photo black and white , but still leaving the color in his eyes. Stay tuned as I will be posting a tutorial on how to achieve this effect!


Voila! A beautiful photo all completed :)
Oct 4, 2011
Taking Better Pictures: Lighting
Lighting is probably the one aspect of photography I have struggled most to perfect. Its an ongoing process, and the more i experiment, the more I progress with understanding light and how to use it in my favor. Lighting can be the main factor in a beautiful photograph, or the reason a photograph turned out terrible. Being able to manipulate light, and truly understand its effect on your photography, is a key skill you must learn if you want to take better pictures.
I am not a seasoned expert on lighting, nor do I claim to be. I have however, spent countless hours over the past few years practicing, and studying lighting. I would like to share with you some of the tips and tricks I have learned along the way.
Lighting Tips
1. My favorite lighting is either in the morning right after sunrise, or in the evening right before sunset. The light is soft, and not as harsh as mid afternoon, direct sun.
2. Shoot with the sun behind you. This will prevent lens flare, and bad reflections.
3. When shooting inside with an external flash, manipulate the direction your flash is facing so that it is bouncing off something and landing on your subject. This makes a huge difference when photographing anything indoors.
4. Read awesome lighting articles like this one by digitalphotopro.com. It perfectly explains and diagrams the family of angles which is a must to know for lighting.
5. Get Creative : A piece of tinfoil, or even a car sun reflector will do as a makeshift light reflector. Learing to reflect light off of your subject will aid you in eliminating nasty shadows that like to pop up when your shooting outside.
6. Spend lots of time on strobist.com... An AMAZING resource for all things lighting.
7. Get an external flash. If your really serious about taking beautiful pictures, I personally think its a must have. I never knew how much of a difference it made until I borrowed my dads. If your unsure, remember you can rent one and try it out before committing to shelling out the cash for one of your own.
8. The best lighting your going to get is natural light. Even if you cannot go outside, try and shoot with as much natural light as you can. Open all the windows, and shoot in front of one with the natural lighting behind you.
9.Join a lighting group or forum. There are tons online and on Flickr. You'll be surprised at how willing people are to answer your lighting questions, and provide helpful information. i have resorted to this so many times, and have learned so much!
10. PRACTICE! I know I say this at the end of every article, but seriously, practicing is the only way you will truly learn and progress. Its so key, don't get frustrated, just keep shooting!!!!!!
I am not a seasoned expert on lighting, nor do I claim to be. I have however, spent countless hours over the past few years practicing, and studying lighting. I would like to share with you some of the tips and tricks I have learned along the way.
 |
| Photo taken with natural, morning light for amazing results and beautiful light. |
Lighting Tips
1. My favorite lighting is either in the morning right after sunrise, or in the evening right before sunset. The light is soft, and not as harsh as mid afternoon, direct sun.
2. Shoot with the sun behind you. This will prevent lens flare, and bad reflections.
3. When shooting inside with an external flash, manipulate the direction your flash is facing so that it is bouncing off something and landing on your subject. This makes a huge difference when photographing anything indoors.
4. Read awesome lighting articles like this one by digitalphotopro.com. It perfectly explains and diagrams the family of angles which is a must to know for lighting.
5. Get Creative : A piece of tinfoil, or even a car sun reflector will do as a makeshift light reflector. Learing to reflect light off of your subject will aid you in eliminating nasty shadows that like to pop up when your shooting outside.
6. Spend lots of time on strobist.com... An AMAZING resource for all things lighting.
7. Get an external flash. If your really serious about taking beautiful pictures, I personally think its a must have. I never knew how much of a difference it made until I borrowed my dads. If your unsure, remember you can rent one and try it out before committing to shelling out the cash for one of your own.
8. The best lighting your going to get is natural light. Even if you cannot go outside, try and shoot with as much natural light as you can. Open all the windows, and shoot in front of one with the natural lighting behind you.
9.Join a lighting group or forum. There are tons online and on Flickr. You'll be surprised at how willing people are to answer your lighting questions, and provide helpful information. i have resorted to this so many times, and have learned so much!
10. PRACTICE! I know I say this at the end of every article, but seriously, practicing is the only way you will truly learn and progress. Its so key, don't get frustrated, just keep shooting!!!!!!
Taking Better Pictures: Understanding ISO, Shutter speed and Aperture
There are 3 important ingredients to a good photograph: ISO, Shutter Speed, and Aperture. Once mastered, these settings are going to make your photograph amazing.
Its easy to rely on the manual settings found on your DSLR, but learning how to fine tune the settings yourself will make all the difference. Learning these takes time, and I definitely recommend practicing as much as possible until you feel comfortable with them. Below, I will briefly explain each one and how to use them in your favor.
ISO
According to DPS, ISO is defined as the measurement of sensitivity of the image sensor.

Aperture
Aperture is defined as "the size of the opening in the lens of where your picture is taken" (DPS).
Once mastered, this setting will move you from so-so photo's to professional looking photo's.
Aperature is also referred to as the "f-stop" and is measured as f/7, f/5, and even f/5.6.
An easy way to remember what aperture does is this: Say you want those beautiful portraits where your subject is in focus, and the background is all blurred. Setting your aperture to a lower f stop such as f/5 or even lower, would achieve this look. Say you want to photograph a landscape, and prefer that everything in the picture is in focus. You would set your aperture to a higher setting like f/8 or f/9.
Another thing to remember with Aperture is that it will also affect the light let into your photographs. A larger f stop, the more light that comes in. The smaller the f stop, the less light will be allowed.

Bringing it all together
Scenario 1: You want to take a photograph of a flower, and would like to get the petals in focus, and the background blurred. You are in the shade, and need some added light into your photograph.
I had this issue today... What you would need to do, is set your camera's ISO, Shutter Speed, and Aperature making sure each one compliments the other thus producing an amazing photograph. Heres how to do it....
I left my ISO at 100 since my natural lighting wasnt dark enough where i needed to boost it, also, I wanted to keep everything soft with as little grain as possible.
I decreased my shutterspeed, but left it high enough that i would get no blur from un wanted movements in my photograph. I set it at about 1/100.
Since i have allowed a little addedlight by decreasing my shutter speed, i then placed my aperature at an in between f stop of about f/5.6. This diminished the shade, and gave a sunkissed feel.
**Remember, if the f/stop is too low, you will need a tripod as unwanted hand shake is sure to add a blur in your photo.
Then i shot away at my subject. I got some great in focus shots of my subject, but the background came out blurred giving my photo a soft feel. See how it turned out below:

Bottom Line
Higher ISO: More Light, More Grain
Lower ISO: Less Light - Less Grain
Higher Shutterspeed: Less Light
Lower Shutterspeed: More Light - More chances for blurred images (As your shutter will be open for a longer time)
Higher F Stop: Less Light
Lower F Stop: More Light - More chances of blurred images without a tripod- as your image is being exposed for longer.
Hopefully this article gave you an a-ha moment when it comes to how your cameras settings can affect your photo. I once again recomend practicing as much as possible until it clicks. It took me a while of just shooting pictures of anything to finally understand these settings, and putting them all together.
As always, if you have any specific questions, feel free to shoot me an email and I will try to help as best as I can.
Thanks to Digital Photography Schools amazing articles for the definitions :)
Its easy to rely on the manual settings found on your DSLR, but learning how to fine tune the settings yourself will make all the difference. Learning these takes time, and I definitely recommend practicing as much as possible until you feel comfortable with them. Below, I will briefly explain each one and how to use them in your favor.
ISO
According to DPS, ISO is defined as the measurement of sensitivity of the image sensor.
On your camera, ISO is measured in numbers ranging from 100 -3200.
Basically, what this means to your photo's is how much light is needed for your image. If your in a well lighted setting, an ISO setting of 100 is sufficient for a nice photograph. However, the darker the scene, the higher you need to set your ISO setting.
But wait, theres a catch :) With ISO, a setting of 100 will provide you with a nice, soft image with no grainy effects. However, the higher the ISO setting you go, the more grain will appear in your image. Luckily there are ways to fix this post processing, and sometimes you cannot help but to raise your ISO.
The below photograph is an example I found accompanying the DPS article on ISO that shows a photograph taken with two different ISO extremes.
The photo on the left was taken with an ISO of 100, the photo on the right was taken with an ISO of 3200.
You will notice the right photo is darker, but is softer with no grain. The photo to the right is more lit, but there is a grainy texture to it.
Like I said in my previous article, its a good idea to familiarize yourself with ISO by taking a photograph at each different ISO, and documenting which is which. Upload them on your computer to get a better look at the differences.
Shutter Speed
Now you would think Shutter Speed is how fast your camera can take pictures. In a way that is true, but there is so much more to it.
Shutter Speed is the amount of time that the shutter of your camera is open.
The longer the shutter is open, the more light is allowed into your photograph and vise versa. What that basically means is, the slower the shutter speed the lighter the photograph. The faster the shutter-speed, the darker (as a fast shutter speed is not allowing a lot of light in).
Shutter speed is measured in seconds. I.e: 1/1000, 1/40. 1/1000 is a much faster speed than 1/40, thus allowing less time for light to enter your photograph, which brings me to my next point.
If you are interested in taking beautiful shots of the night sky, or any photographs in the darker hours, shutter speed is your friend. Grab a tripod, and set your shutter speed to a lower setting (i.e 1/10, 1/20). This will let more light in, and allow you to properly capture your subject.
Another thing that shutter speed is important for is action photogaphy. If you decide to shoot your child's soccer game, set the shutter speed to a faster setting, i.e 1/500 to be able to capture all those action shots.
I will be posting some more in depth articles on shutter speed, its my favorite setting that I have mastered.
 |
| I took this photograph using an in between shutter speed around 1/100. I wanted some added light, but also wanted to capture the movement of the bee in flight. |
Aperture
Aperture is defined as "the size of the opening in the lens of where your picture is taken" (DPS).
Once mastered, this setting will move you from so-so photo's to professional looking photo's.
Aperature is also referred to as the "f-stop" and is measured as f/7, f/5, and even f/5.6.
An easy way to remember what aperture does is this: Say you want those beautiful portraits where your subject is in focus, and the background is all blurred. Setting your aperture to a lower f stop such as f/5 or even lower, would achieve this look. Say you want to photograph a landscape, and prefer that everything in the picture is in focus. You would set your aperture to a higher setting like f/8 or f/9.
Another thing to remember with Aperture is that it will also affect the light let into your photographs. A larger f stop, the more light that comes in. The smaller the f stop, the less light will be allowed.

Bringing it all together
Scenario 1: You want to take a photograph of a flower, and would like to get the petals in focus, and the background blurred. You are in the shade, and need some added light into your photograph.
I had this issue today... What you would need to do, is set your camera's ISO, Shutter Speed, and Aperature making sure each one compliments the other thus producing an amazing photograph. Heres how to do it....
I left my ISO at 100 since my natural lighting wasnt dark enough where i needed to boost it, also, I wanted to keep everything soft with as little grain as possible.
I decreased my shutterspeed, but left it high enough that i would get no blur from un wanted movements in my photograph. I set it at about 1/100.
Since i have allowed a little addedlight by decreasing my shutter speed, i then placed my aperature at an in between f stop of about f/5.6. This diminished the shade, and gave a sunkissed feel.
**Remember, if the f/stop is too low, you will need a tripod as unwanted hand shake is sure to add a blur in your photo.
Then i shot away at my subject. I got some great in focus shots of my subject, but the background came out blurred giving my photo a soft feel. See how it turned out below:

Bottom Line
Higher ISO: More Light, More Grain
Lower ISO: Less Light - Less Grain
Higher Shutterspeed: Less Light
Lower Shutterspeed: More Light - More chances for blurred images (As your shutter will be open for a longer time)
Higher F Stop: Less Light
Lower F Stop: More Light - More chances of blurred images without a tripod- as your image is being exposed for longer.
Hopefully this article gave you an a-ha moment when it comes to how your cameras settings can affect your photo. I once again recomend practicing as much as possible until it clicks. It took me a while of just shooting pictures of anything to finally understand these settings, and putting them all together.
As always, if you have any specific questions, feel free to shoot me an email and I will try to help as best as I can.
Thanks to Digital Photography Schools amazing articles for the definitions :)
Oct 2, 2011
DSLR Users: Understanding Your Camera's Settings, and putting them to use.
If you are a DSLR user, and have never used any different settings other than Manual Mode...You are truly missing out! Once I learned what those settings were for, and how to use them, my photography got a lot better.
So grab your camera and follow along, soon you will be on your way to taking better photos!
Disclaimer: I am using a Canon camera as an example. If you have a different brand, the settings could appear differently.
Lets Get Started...
On top of your camera, you will see a dial that will allow you to select various methods of photography settings. Each setting is fine tuned specifically for certain types of photos. Lets start at the top:

This week, I challenge you to each day shoot at least one object using a different setting every day. Ex, day 1 shoot a portrait of your loved one using portrait mode. Day 2- Shoot the moon using Night Mode, etc. This will give you a better understanding of each setting. I personally am a visual learner, so this is what I did. Seeing the finished result really turned the lightbulb on for me!
Id love to see your work!
So grab your camera and follow along, soon you will be on your way to taking better photos!
Disclaimer: I am using a Canon camera as an example. If you have a different brand, the settings could appear differently.
Lets Get Started...
On top of your camera, you will see a dial that will allow you to select various methods of photography settings. Each setting is fine tuned specifically for certain types of photos. Lets start at the top:

- No Flash: Self explanatory, this will allow you to shoot without your flash
- Night Portrait: Allows your camera to compensate for under exposure. This setting also uses longer exposures, meaning your lens opens longer allowing more light through. What this means for you, is if you are planning on taking night photo's, or anything using this setting, I recommend a tripod as any slight movement will give you a blurred photograph.
- Sports Mode: Settings programed allow camera to take the fastest shots in your current lighting condition. This is a great setting for catching a lot of motion.
- Macro: This setting will allow you to get up close and personal with your subject without affecting your focus. Great for detailed shots such as grass, bugs and flowers
- Landscape Mode: This setting will eliminate your depth of field, meaning no soft, blurred backgrounds. Everything in the photo will be nice and sharp.
- Portrait Mode: This setting allows you to take pictures where your subject is nice and focused, yet the background is soft and blurred. This decreases your depth of field which gives you the blurred background effect. Great for capturing bokeh in your background.
- Full Auto: If you are in a rush, and don't feel like fine tuning your settings...than this is the one for you. It will do all the work for you, but only produces so-so images in my opinion.
- “P” or Program Mode: Same as Full Auto, but allows you to adjust your ISO settings.
- “TV” or Shutter Priority Mode. Will allow you to increase or decrease your shutter speed. When you increase the shutter speed, your allowing less light in, decreasing the speed will allow more light in.
- “AV” or Aperture Priority Mode: Controls your depth of field. The larger you go, the more in focus both the background and foreground image will be. The shorter you go, the more of a soft, blurred background you will have while still keeping your subject focused.
- “M” or Manual Mode: This setting allows you to customize ALL your settings such as shutter speed, iso, aperture, etc. This is the setting most professional photographers used. I recommend this setting once you have become very accustomed and experienced with all the basics.
- “A-DEP” or Aperture Dependent Mode: This mode is honestly pretty confusing to me. I believe it allows you to customize your settings even more than Manual does. I've never used it, i have found that the other settings are sufficient enough for me. However, I am sure there are some major seasoned pros who use this mode, who knows?
Excercise
This week, I challenge you to each day shoot at least one object using a different setting every day. Ex, day 1 shoot a portrait of your loved one using portrait mode. Day 2- Shoot the moon using Night Mode, etc. This will give you a better understanding of each setting. I personally am a visual learner, so this is what I did. Seeing the finished result really turned the lightbulb on for me!
Id love to see your work!
Oct 1, 2011
New Series: Photography Tips & Tutorials : Getting Started
Recently, I have been posting a lot of fun pictures on my facebook page that I have taken of my son. A lot of my friends are mommies, and they are always asking, "How did you get those beautiful pictures? Did you hire a professional?" I decided that this would be a great topic to discuss on my blog.
I am self taught, and am no expert by any means. I have done extensive research, had years of practice, and had the opportunity to pick the brains of some very talented photographers. This is how I got where I am, and Id like to pay it forward by teaching you all how to take better, more professional looking pictures.
Getting Started: Equipment
1. The Camera
If you are serious about photography, and have the money, I definitely recommend purchasing a DSLR camera. I personally have had great experience with Canons. I currently use a Canon Rebel x2i. Obviously by using a DSLR, you are going to get clearer, more crisp photo's, with the option of printing them at humongous sizes. If you don't have the money to get a DSLR, don't fear...A point and shoot still has the capability of taking beautiful photos with the added help of a little post processing (Ill discuss that a little later)
2. A Flash
If you have a DSLR, I personally recommend purchasing an external flash. This is a device that attaches to your camera, and is an alternative to the built in flash that I find to be a little harsh sometimes. If you are working with a point and shoot, your built in flash is your only option, and you can work with it. Also, if you have a point and shoot, there is a great tutorial on how to create a DIY flash diffuser. Diffusers help eliminate harsh light and shadows and can help leave your photos looking more natural. A diffuser is a great purchase for any camera, but again, you can still achieve beautiful pictures without one.
3. A Tripod
Tripods are a must have if you are interested in taking your own family portraits, shooting night photography, and more.
DSLR: By personal experience, spend the money on a nice tripod... Its worth it. I once purchased a cheap version on amazon, thinking, its still a tripod. I soon learned that it was a total waste of money. Not only was it near impossible to adjust height, it was extremely flimsy and barely held my camera without toppling over. Luckily, my wonderful father purchased me a really nice tripod for Christmas, and what a difference! You want to be able to place your camera on your tripod, and move it around in different angles without it falling over. Also, being able to easily manipulate the height is a big help especially when shooting family portraits.
Point and Shoot: Guess what? They make these adorable little mini-tripods for point and shoot camera's! They are great, and actually can be purchased at places like Walmart and Target. They are called "Gorillapods". Super flexible, sturdy, and so cute! Visit their website here
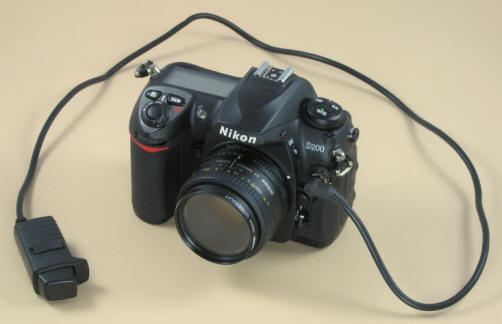
4. Shutter Release (optional, but handy)
I love my shutter release. I did purchase a cheap one on Amazon, but it works great. It cost me about 12$, and its not attached to a cord which gives me more freedom when using. These are made mainly for DSLR camera's. I am not sure if they are made for point and shoots, only because there is a certain setting on your camera that allows you to use a shutter release. I recommend checking your camera settings for that option, if it is there, it should work.
5. Lenses
The lens you have on your point and shoot is fine. In fact, if you decide you want some of the added perks of different lenses that DSLR's have, photojojo.com has a great selection of lenses built specially for the point and shoot camera.
For the DSLR users, I honestly believe that the basic lens that comes with your camera is the best. I use it for almost everything. If you decide you really want to get into photography, then a telephoto lens is great for shooting things from far away (I use mine for shooting animals and wildlife). Also, a portrait lens is a must have. It is usually 105 mm lens, and it will give you that wonderful focused image with a soft background. This can be achieved with the standard lens as well, but the portrait lens is a great addition to any lens collection.
Cant afford to buy a new lens? Rent One! My dad dabbles in photography, and he was attending a Native American Pow-Wow in Wisconsin one year. He really needed a super telephoto lens so he could capture the festivities without getting all up in everyone business. He found a great site where you can rent any lens you wish for a weekend, a week, or two weeks. I plan on utilizing this service during the winter months when the Bald Eagles migrate through Missouri. Last year, my telephoto lens worked, but I really want those beautiful close ups. I don't have the money for one of these lenses, so renting is a wonderful option!
Visit Lens Rentals.com here!
That is the very basic equipment i personally recommend having to take better pictures. Again, I am not an expert by any means, just speaking from personal experience. I started off very basic, with only one lens. After seeing how much I loved photography, I slowly began to add to my collection. That's the beauty of photography, there is always something exciting that is coming out to further your hobby!
Getting Started: Post Processing
My favorite post processing program to use is Adobe Lightroom. However, this program is pretty pricey. Cant afford to splurge? The post processing website I started with (btw- its free) is picnik. Picnik is a free photo editing website, that is AMAZING. Its the best out there in my oppinion. Its also great for someone who doesn't have a ton of time (cough, cough, moms). It allows you to add beautiful effects to your photos in just seconds. I will be adding lots of tutorials on how to use picnik, as I really loved that site. I eventually got Adobe Lightroom and Photoshop, and with the kind of photography I do now, it works better for me. I still use Picnik though!
Getting Started: Resources
When I was first getting involved with photography, I spent countless hours researching online, reading books, etc. During that time, I found some amazing websites that really taught me a lot. They also inspired me to get out and just shoot tons of pictures, which in return, made me a better photographer. If you have time, check them out...you wont be disappointed!
1. Digital Photography School
This is my favorite, and endless supply of photography knowledge, tutorials and post processing help.
2. Photojojo
This site is a super creative, fun source that teaches you ways to look outside the box with photography. It also has a bunch of really fun photography products available for purchase directly from their site.
3. Photo.net
This is a great online community of really nice photographers, and photography enthusiast. The forums have helped me with a lot of questions, and everyone always seems willing to help out a newbie :)
4. Chookooloonks
Karen Waldrond is not only an amazing photographer, she is a strong, smart women who inspires me in every aspect. She features great photography advice, and also writes amazing articles that just empower you on a daily basis. Her blog features some of her AMAZING photography, and I have found endless amounts of inspiration from her. Definitely a daily read.
I am self taught, and am no expert by any means. I have done extensive research, had years of practice, and had the opportunity to pick the brains of some very talented photographers. This is how I got where I am, and Id like to pay it forward by teaching you all how to take better, more professional looking pictures.
Getting Started: Equipment
1. The Camera
If you are serious about photography, and have the money, I definitely recommend purchasing a DSLR camera. I personally have had great experience with Canons. I currently use a Canon Rebel x2i. Obviously by using a DSLR, you are going to get clearer, more crisp photo's, with the option of printing them at humongous sizes. If you don't have the money to get a DSLR, don't fear...A point and shoot still has the capability of taking beautiful photos with the added help of a little post processing (Ill discuss that a little later)
2. A Flash
If you have a DSLR, I personally recommend purchasing an external flash. This is a device that attaches to your camera, and is an alternative to the built in flash that I find to be a little harsh sometimes. If you are working with a point and shoot, your built in flash is your only option, and you can work with it. Also, if you have a point and shoot, there is a great tutorial on how to create a DIY flash diffuser. Diffusers help eliminate harsh light and shadows and can help leave your photos looking more natural. A diffuser is a great purchase for any camera, but again, you can still achieve beautiful pictures without one.
 |
| Soft, dreamy photos using a flash |
3. A Tripod
Tripods are a must have if you are interested in taking your own family portraits, shooting night photography, and more.
DSLR: By personal experience, spend the money on a nice tripod... Its worth it. I once purchased a cheap version on amazon, thinking, its still a tripod. I soon learned that it was a total waste of money. Not only was it near impossible to adjust height, it was extremely flimsy and barely held my camera without toppling over. Luckily, my wonderful father purchased me a really nice tripod for Christmas, and what a difference! You want to be able to place your camera on your tripod, and move it around in different angles without it falling over. Also, being able to easily manipulate the height is a big help especially when shooting family portraits.
Point and Shoot: Guess what? They make these adorable little mini-tripods for point and shoot camera's! They are great, and actually can be purchased at places like Walmart and Target. They are called "Gorillapods". Super flexible, sturdy, and so cute! Visit their website here
 |
| Maternity self portrait using a tripod |
4. Shutter Release (optional, but handy)
I love my shutter release. I did purchase a cheap one on Amazon, but it works great. It cost me about 12$, and its not attached to a cord which gives me more freedom when using. These are made mainly for DSLR camera's. I am not sure if they are made for point and shoots, only because there is a certain setting on your camera that allows you to use a shutter release. I recommend checking your camera settings for that option, if it is there, it should work.
5. Lenses
The lens you have on your point and shoot is fine. In fact, if you decide you want some of the added perks of different lenses that DSLR's have, photojojo.com has a great selection of lenses built specially for the point and shoot camera.
For the DSLR users, I honestly believe that the basic lens that comes with your camera is the best. I use it for almost everything. If you decide you really want to get into photography, then a telephoto lens is great for shooting things from far away (I use mine for shooting animals and wildlife). Also, a portrait lens is a must have. It is usually 105 mm lens, and it will give you that wonderful focused image with a soft background. This can be achieved with the standard lens as well, but the portrait lens is a great addition to any lens collection.
Cant afford to buy a new lens? Rent One! My dad dabbles in photography, and he was attending a Native American Pow-Wow in Wisconsin one year. He really needed a super telephoto lens so he could capture the festivities without getting all up in everyone business. He found a great site where you can rent any lens you wish for a weekend, a week, or two weeks. I plan on utilizing this service during the winter months when the Bald Eagles migrate through Missouri. Last year, my telephoto lens worked, but I really want those beautiful close ups. I don't have the money for one of these lenses, so renting is a wonderful option!
Visit Lens Rentals.com here!
That is the very basic equipment i personally recommend having to take better pictures. Again, I am not an expert by any means, just speaking from personal experience. I started off very basic, with only one lens. After seeing how much I loved photography, I slowly began to add to my collection. That's the beauty of photography, there is always something exciting that is coming out to further your hobby!
 |
| Using a telephoto lens allows you to get great close up shots of hard to reach subjects |
Getting Started: Post Processing
My favorite post processing program to use is Adobe Lightroom. However, this program is pretty pricey. Cant afford to splurge? The post processing website I started with (btw- its free) is picnik. Picnik is a free photo editing website, that is AMAZING. Its the best out there in my oppinion. Its also great for someone who doesn't have a ton of time (cough, cough, moms). It allows you to add beautiful effects to your photos in just seconds. I will be adding lots of tutorials on how to use picnik, as I really loved that site. I eventually got Adobe Lightroom and Photoshop, and with the kind of photography I do now, it works better for me. I still use Picnik though!
 |
| Photograph edited using picnik |
Getting Started: Resources
When I was first getting involved with photography, I spent countless hours researching online, reading books, etc. During that time, I found some amazing websites that really taught me a lot. They also inspired me to get out and just shoot tons of pictures, which in return, made me a better photographer. If you have time, check them out...you wont be disappointed!
1. Digital Photography School
This is my favorite, and endless supply of photography knowledge, tutorials and post processing help.
2. Photojojo
This site is a super creative, fun source that teaches you ways to look outside the box with photography. It also has a bunch of really fun photography products available for purchase directly from their site.
3. Photo.net
This is a great online community of really nice photographers, and photography enthusiast. The forums have helped me with a lot of questions, and everyone always seems willing to help out a newbie :)
4. Chookooloonks
Karen Waldrond is not only an amazing photographer, she is a strong, smart women who inspires me in every aspect. She features great photography advice, and also writes amazing articles that just empower you on a daily basis. Her blog features some of her AMAZING photography, and I have found endless amounts of inspiration from her. Definitely a daily read.
Subscribe to:
Posts (Atom)
LinkWithin
